10 Easy Steps to Fix a Broken Double Pane Window
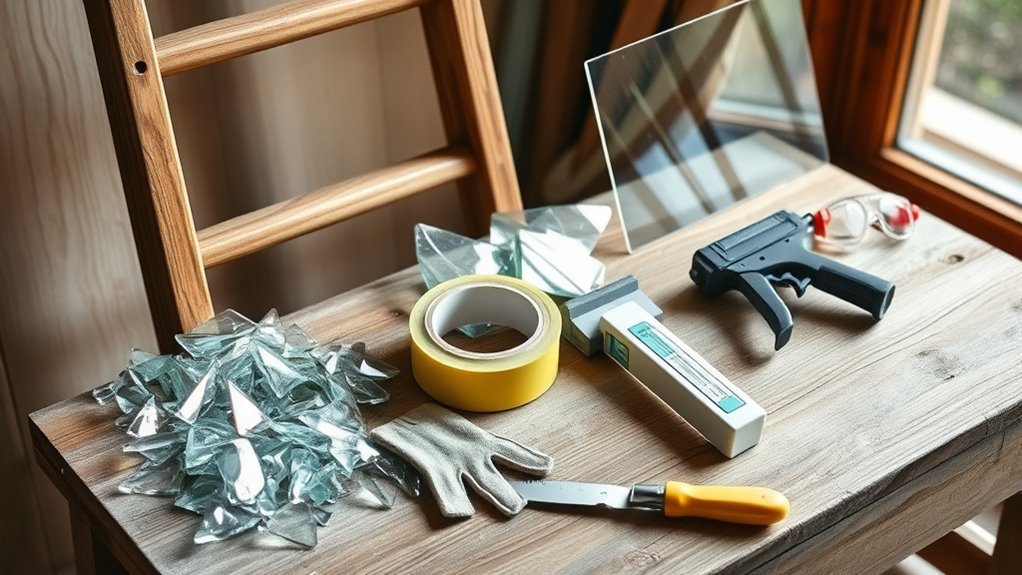
To fix a broken double-pane window, start by gathering essential tools like suction cups, gloves, a putty knife, and silicone sealant. These tools will help you safely and effectively handle the repair process. Wearing safety gear is crucial when working with broken glass.
Carefully remove the old glazing bead and broken glass from the frame. Once the frame is clear, clean it thoroughly to ensure a proper seal for the new pane.
Next, apply a continuous bead of silicone sealant to the frame to create an airtight barrier. Use suction cups to position the replacement glass, then press it firmly into place.
Snap in new vinyl glazing beads to secure the pane.
Finally, check for an even, airtight seal around the window. This will help maintain energy efficiency and prevent drafts. Keep following these steps to complete a safe and effective double-pane window repair.
Gather Tools and Materials for Window Pane Replacement
Before you begin replacing your broken double pane window, make certain you’ve gathered all the necessary tools and materials. Start by taking precise measurements of the window opening—height, width, and thickness—to the nearest 1/16 inch. Accurate measurements ensure your replacement glass or insulated glass unit (IGU) fits perfectly, preventing gaps or poor sealing.
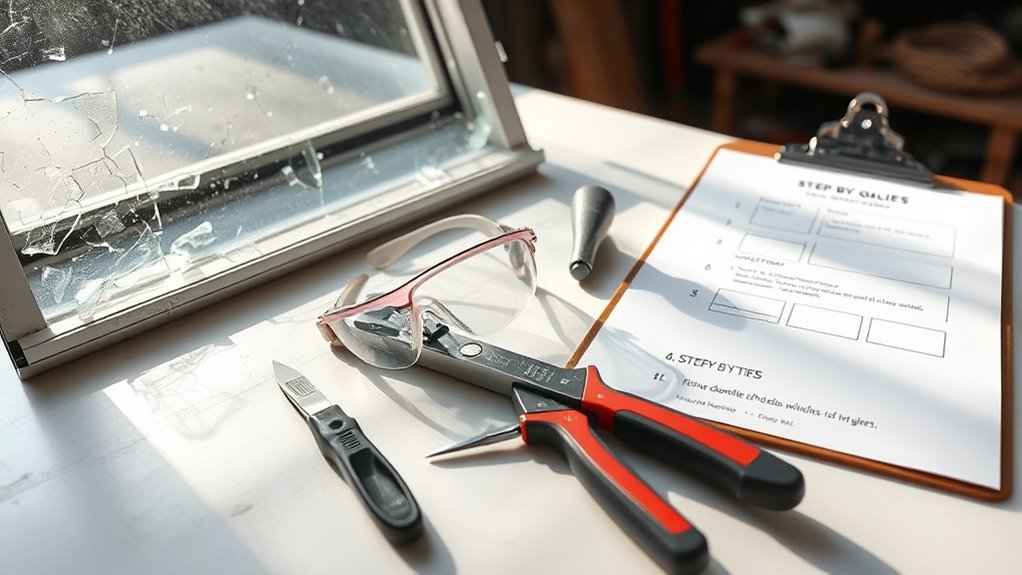
You’ll need essential tools like suction cups for safely handling glass, a scraper or putty knife to remove old glazing, and safety gloves and glasses to protect yourself. For materials, have new glass or IGUs ready along with glazing beads or beading strips, and silicone sealant designed specifically for windows.
If your pane is large or heavy, consider renting specialized equipment such as a glass lifting suction cup to make the job safer and easier.
Handle Double-Pane Window Panes Properly
Before you start, make sure to wear gloves and safety goggles to protect yourself from sharp edges. Handle the glass carefully by its edges or use suction cups to avoid putting pressure on the panes.
Taking these precautions will help you work safely and prevent accidental breakage.
Safety Precautions
When handling double-pane window panes, you’ll want to protect yourself by wearing safety goggles and work gloves to guard against broken glass and sharp edges. Here are essential safety precautions to follow during glass removal:
- Always wear safety goggles and protective gloves to shield your eyes and hands from shards.
- Use a utility knife or heat gun carefully to cut old sealant without damaging the glass or frame.
- Apply painter’s tape around glass edges to contain shards and prevent scattering.
- Dispose of shattered glass in a sturdy container to avoid injury during cleanup.
Correct Handling Techniques
Although handling double-pane glass requires care, you can protect yourself and the window by always wearing safety gloves and safety glasses to prevent cuts from sharp edges or shards. When handling edges, grip the pane firmly but gently to avoid damage.
Use suction cups to support the glass evenly, reducing the risk of slipping or dropping it. Always avoid touching the glass surface to keep it clean and preserve the seal. Inspect the pane first for cracks or chips to prevent breakage during installation.
| Step | Action | Tip |
|---|---|---|
| Wear safety gloves | Protect hands | Prevent cuts from shards |
| Handle edges | Grip firmly | Avoid touching glass surface |
| Use suction cups | Support glass | Prevent slipping or dropping |
Know When to Call a Pro for Window Pane Repair
If you notice fogging between panes or large cracks, it’s time to call a pro instead of trying a DIY fix. DIY repairs can worsen the problem or cause improper sealing, risking more damage.
Hiring an expert guarantees the job is done right, preserving your window’s efficiency and safety.
Signs Of Professional Help
You’ll want to call a professional in several key situations to guarantee your double-pane window gets the proper care. Recognizing signs of professional help will save you time and ensure quality window repair. Here are four clear indicators:
- Persistent fogging or moisture between panes signals a failed seal needing expert restoration.
- Cracked or shattered broken glass beyond simple DIY removal requires a licensed glass technician.
- Warped, rotted, or compromised window frames call for a professional assessment to decide repair or replacement.
- Large or hard-to-reach windows, especially above ground level, need pros for safe handling and proper sealing.
If you’re unsure about measurements or sealing techniques, consulting a pro helps avoid costly mistakes and future issues.
Risks Of DIY Repairs
Recognizing when a professional should handle your double-pane window repair helps prevent costly mistakes. DIY repairs might seem tempting, but tackling broken window glass yourself often leads to improper sealing. This can reduce energy efficiency and increase your utility bills.
Without the right tools and experience, you risk damaging the glass or frame, creating safety hazards. Improperly installed windows may fog up or develop moisture buildup quickly, causing further issues. Some problems, like seal failure or cracked insulated glass units, demand specialized equipment and expertise beyond DIY methods.
When facing large or complex repairs, calling a pro ensures the job is done correctly and lasts longer, saving you from repeated fixes and unexpected expenses. Don’t let DIY repairs compromise your home’s comfort or safety.
Benefits Of Expert Service
Why trust a professional with your double-pane window repair? Choosing expert service guarantees your window is correctly sealed and installed, preventing leaks and fogging.
Here’s why you should consider professional window repair:
- Experts use specialized tools to handle large or hard-to-reach panes safely.
- They reduce the risk of damaging glass or frames, saving you time and money.
- Professional repairs often come with a warranty, giving you peace of mind.
- For complex issues like seal failure, expert service provides a reliable, long-lasting fix.
When you want a durable, worry-free repair, calling a pro is the smartest move. Don’t risk DIY errors—invest in professional window repair for quality and assurance.
Remove Old Glazing Bead Safely
Before you can replace the glass, gently pry the vinyl glazing bead away from the window frame using a flat-head screwdriver or putty knife, starting at a corner. Carefully work along the edges, applying even pressure to avoid cracking or damaging the glazing bead.
If some sections resist, use a heat gun to soften any sealant or adhesive holding the bead in place. Make sure to remove all beading strips completely to expose the glass edges fully and allow proper access for replacement.
Once removed, store the glazing bead safely if you plan to reuse it during reinstallation. Otherwise, prepare to replace it with new strips to ensure a secure and professional finish on your repaired double pane window.
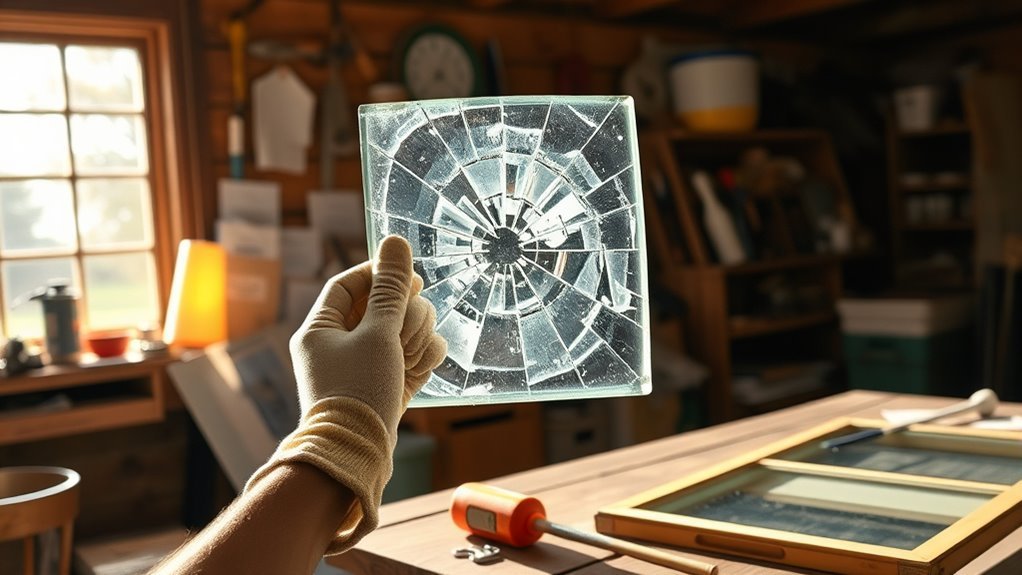
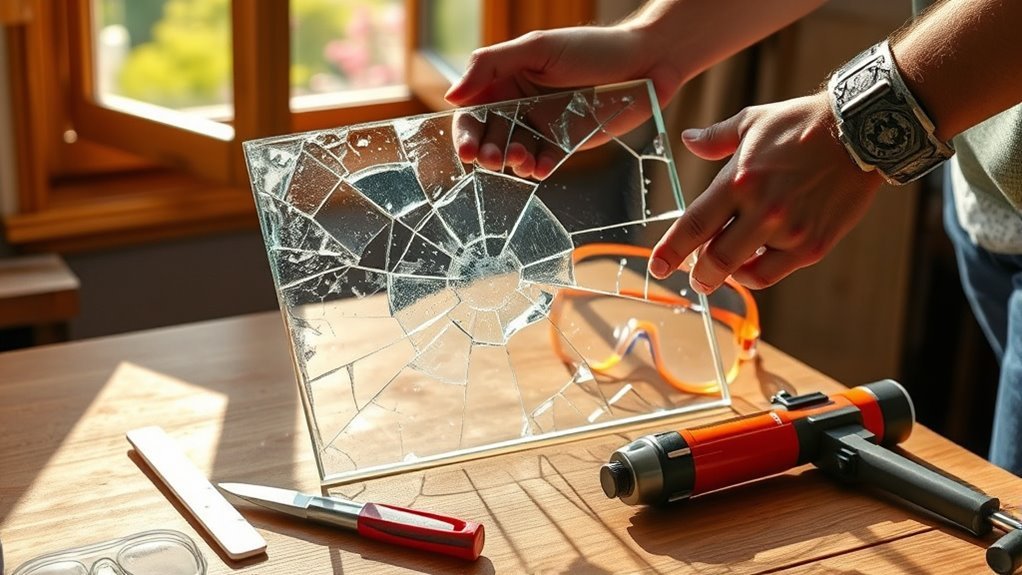
Carefully Extract Broken Glass From the Frame
With the old glazing bead removed, you can now focus on extracting the broken glass safely. To remove the glass without injury or frame damage, follow these steps:
- Wear heavy-duty gloves and safety goggles to protect yourself from sharp shards.
- Apply painter’s tape or duct tape over the broken glass to secure loose pieces.
- Use a utility knife or heat gun to cut through any old silicone or sealant surrounding the glass.
- Carefully lift and remove the broken glass pieces, placing them into a sturdy container or thick trash bag for safe disposal.
Clean and Prepare the Window Frame for New Glass
Although removing the broken glass was a crucial step, you now need to thoroughly clean and prepare the window frame to guarantee the new glass seals properly. Start by scraping away all old glazing compound and silicone with a putty knife or scraper, ensuring the window frame is free of debris.
Next, use a wire brush or sanding tool to smooth any rough spots within the frame grooves. After that, clean the entire frame channel using glass cleaner or isopropyl alcohol to remove dust, grease, and residue.
Finally, wipe the frame dry with a lint-free cloth or sponge. This careful cleaning and preparation ensure the glazing compound adheres securely, setting the stage for a proper seal when you install the new glass.
Apply Silicone Bedding to Seal the New Glass
Now that the frame is ready, you’ll want to apply a continuous bead of silicone around the edge to create a tight, airtight seal. Use a caulking gun with steady pressure to keep the bead smooth and even, avoiding any excess that could make a mess.
Once applied, let the silicone cure for at least 24 hours before moving on to ensure a secure bond.
Silicone Application Techniques
Before placing the new glass, you’ll want to apply a continuous bead of silicone caulk around the entire perimeter of the window frame’s glazing pocket. This creates a weather-tight seal that’s vital for long-lasting results. Follow these steps for effective silicone application:
- Load your caulking gun and apply the silicone caulk with steady, even pressure to avoid gaps or bumps.
- Keep a consistent bead width of about 1/4 inch to ensure proper coverage and adhesion.
- Immediately tool the silicone with a gloved finger or finishing tool to smooth the bead and remove excess.
- Let the silicone cure fully—usually 24 hours—before handling or exposing the window to moisture or stress.
This technique ensures your new glass sits securely in the glazing pocket with a reliable seal.
Ensuring Airtight Seals
Once you’ve applied the silicone around the glazing pocket, it’s time to focus on sealing the new glass itself. Apply a continuous, even bead of high-quality, 100% silicone caulk around the window’s perimeter to create an airtight seal. This silicone seal prevents air and moisture infiltration while accommodating frame expansion and contraction.
| Step | Material | Purpose |
|---|---|---|
| 1 | Silicone Caulk | Creates airtight seal |
| 2 | Glazing Pocket | Holds glass securely |
| 3 | Glass Panel | New double pane glass |
| 4 | Sealant Tool | Smooths silicone evenly |
Make sure to cover all edges completely for maximum protection. This ensures your window stays sealed and durable.
Drying and Curing Times
Although applying the silicone bedding properly is essential, you’ll need to allow 24 to 48 hours for it to fully cure and create a strong, airtight seal. During this curing time, follow these key steps to ensure success:
- Keep the silicone bedding undisturbed and avoid pressing on the window.
- Be aware that very dry conditions may extend drying times, so consider humidity levels.
- Avoid washing or exposing the sealed window to water until the silicone is fully cured.
- Understand that silicone remains tacky for several hours but will harden and seal firmly after the recommended curing period.
Use Suction Cups to Position the Replacement Pane
Two suction cups with a weight capacity of at least 50 pounds will help you lift and position the replacement glass pane safely. Start by attaching the suction cups firmly to clean, dry surfaces on the glass replacement to guarantee a secure grip. Use the suction cups to carefully maneuver the pane, aligning it precisely within the window frame.
This tool allows you to control positioning without stressing the glass edges, reducing the risk of cracks or slips. Work slowly and steadily for the best results. Once the pane is correctly positioned, gently press it into the silicone bedding and double-check the alignment.
Using suction cups during glass replacement simplifies handling, making your job safer and more accurate.
Secure the Glass With New Vinyl Glazing Beads
To secure the glass firmly in place, you’ll need to install new vinyl glazing beads around the window pane. These beads hold the double-pane window securely within the window frame and prevent air and moisture leaks.
Here’s how to do it:
- Choose manufacturer-recommended vinyl glazing beads that fit your window model perfectly.
- Starting at one corner, carefully snap or press the beads into the groove surrounding the glass.
- Work your way around the entire window frame, ensuring each section is fully seated.
- Double-check that all vinyl glazing beads are snug to keep the replace glass stable and sealed.
Check Your Work for a Tight, Even Seal
Once you’ve installed the vinyl glazing beads, take a moment to carefully inspect your work. Confirm the sealant is pressed firmly and evenly around the entire frame to guarantee a tight seal. Check that the glass sits flush against the frame with no gaps or uneven spacing.
Use a level or straight edge to verify the window is aligned properly and the seal is consistent on all sides. Inspect the sealed edges for cracks or missing sealant. Finally, gently press around the edges to verify there are no air leaks or loose spots.
| Checkpoint | What to Look For | Action if Problem Found |
|---|---|---|
| Sealant Application | Even, firm around frame | Reapply sealant evenly |
| Glass Position | Flush with frame | Adjust glass positioning |
| Window Alignment | Level and straight | Realign window frame |
| Edge Inspection | No cracks or gaps | Seal cracks or gaps promptly |
Frequently Asked Questions
How to Fix a Broken Double-Pane Window?
You’ll need to remove the broken sealed unit carefully, measure it precisely, and order a replacement.
Then, install the new unit securely, resealing it properly.
If unsure, don’t hesitate to hire a professional for the job.
Does Ace Hardware Repair Double-Pane Windows?
Like a guidebook, Ace Hardware won’t fix your double-pane window for you. You’ll find tools and replacement parts there, but for expert repairs, you’ll want to call a professional window specialist instead.
How to Temporarily Fix a Broken Window Pane?
You should tape an X over the broken glass, carefully remove loose shards, then seal edges with duct tape.
Finally, cover the window with plastic sheeting secured by tape to keep out drafts and weather temporarily.
Can I Replace a Double-Pane Window Myself?
You can absolutely tackle replacing a double-pane window yourself—it’s not rocket science. With the right tools and patience, you’ll save a bundle.
But don’t hesitate to call a pro for complex jobs to avoid headaches down the line.
Conclusion
Now that you’ve replaced your broken double-pane window, doesn’t it feel great to see the world clearly again? With the right tools and careful steps, you’ve saved time and money while restoring your home’s comfort and energy efficiency.
Remember, if the job ever feels too tricky, calling a pro is always wise. You’ve got this—your window is sealed tight, looking great, and ready to weather whatever comes next!
By following these easy steps to fix a broken double pane window, you ensure better insulation and reduce energy costs. Keep your home safe and comfortable by maintaining your windows properly.