7 Steps to Dye Eggs With Gel Food Coloring
To dye eggs with gel food coloring, first gather your supplies like vinegar, hot water, and gel colors. Hard-boil and cool your eggs thoroughly.
Mixing vibrant dye baths is easy by combining hot water, vinegar, and gel coloring.
Dip eggs briefly for light tones or longer for deeper hues.
Let them dry carefully on paper towels, handling gently to avoid cracks.
You can even add shimmer or paint for extra flair.
Keep following for tips on perfecting and displaying your colorful eggs.
Get Your Supplies Ready for Gel Food Colored Eggs

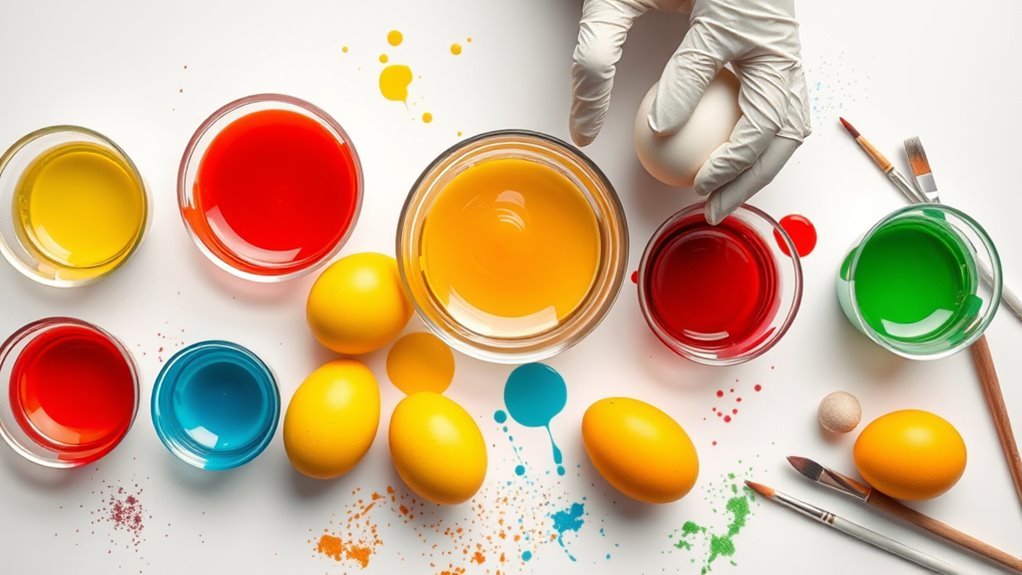
Before you begin dyeing your eggs, gather all your supplies to streamline the process. You’ll need gel food coloring, white vinegar, a muffin pan, and hard-boiled eggs ready for coloring. Prepare a separate dye bath for each shade by mixing ¾ cup hot water with 1 tablespoon white vinegar and adding 3-5 drops of gel food coloring, depending on how vibrant you want your colors.
Stir each mixture until the gel dissolves completely. Set out paper towels or a drying rack to place your eggs on after dyeing; this prevents smudges and helps them dry evenly. To protect your hands from stains, wear disposable gloves throughout.
Having everything ready before you start will make your egg-dyeing experience smooth and enjoyable.
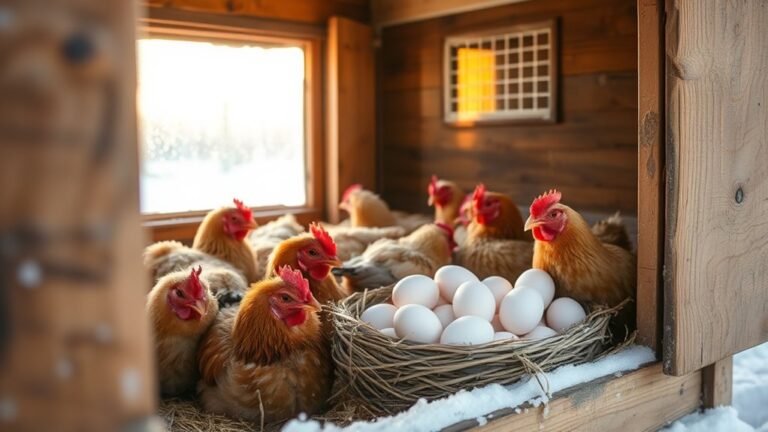
Hard-Boil and Cool Your Eggs

Start by placing a dozen eggs in a saucepan and covering them with cold water, about an inch above the eggs. Bring the water to a rolling boil over medium-high heat and hard-boil the eggs for 10-12 minutes.
Then, turn off the heat, cover the pan, and let the eggs sit for 12-15 minutes to finish cooking. To cool the eggs, rinse them in cold running water until they’re completely cooled. This step stops cooking and makes peeling easier.
Let the eggs reach room temperature before dyeing to prevent cracking in the dye baths.
| Step | Details |
|---|---|
| Hard-Boil | Boil 10-12 minutes |
| Rest Covered | 12-15 minutes off heat |
| Cool | Rinse in cold running water |
Prepare Vibrant Dye Baths Using Gel Food Coloring

Start by filling your cups with hot water and adding gel food coloring drops to create rich hues. Don’t forget to stir in white vinegar—it helps the colors stick and pop on your eggs.
Pick a variety of gel colors and mix each dye bath thoroughly in labeled containers to keep your colors bright and clean.
Mixing Dye Bath Ingredients
When you mix ¾ cup of boiling water with 1 tablespoon of white vinegar, you create the perfect base for your dye bath. Next, add 5 drops of gel food coloring to this mixture. Stir thoroughly until the food coloring fully dissolves and the color spreads evenly.
Preparing separate dye baths for each color lets you achieve vibrant, distinct shades. Always mix each dye bath well before dipping your eggs to ensure consistent, bright colors every time.
| Ingredient | Quantity | Purpose |
|---|---|---|
| Boiling water | ¾ cup | Dissolves coloring |
| White vinegar | 1 tablespoon | Sets dye on eggshell |
| Gel food coloring | 5 drops | Provides vibrant colors |
Mix carefully for the best dye results!
Choosing Gel Food Colors
After mixing your dye baths, focus on selecting gel food coloring shades that will bring your eggs to life. Choose a variety of gel food coloring colors to create vibrant hues that stand out. For each dye bath, use 3-5 drops of gel food coloring per ¾ cup of hot water mixed with 1 tablespoon of white vinegar.
Stir the gel thoroughly until it dissolves completely, ensuring even color distribution. Prepare multiple dye baths with different gel colors to expand your palette and achieve diverse vibrant hues. You can easily adjust the color intensity by adding more or fewer drops of gel food coloring depending on how bold you want your eggs.
This approach guarantees eye-catching, richly colored eggs every time.
Dip Eggs to Achieve Desired Color Intensity
Although achieving the perfect egg color might seem tricky, dipping your eggs in the gel food coloring mixture for just the right amount of time gives you complete control over the shade.
Mastering egg dyeing is easy with precise dipping times in gel food coloring for your ideal shade.
When dyeing eggs, start by submerging each egg for about 5 seconds to get a light, pastel color. If you want a richer hue, soak it for 1 to 2 minutes, checking often to avoid over-darkening.
Use a spoon or tongs to gently lower and lift the egg, ensuring even exposure to the food coloring. Adjust the soaking time based on your desired color intensity—longer dips produce deeper, more vibrant egg dye.
This method lets you customize each egg’s shade perfectly without guesswork.
Dry and Handle Gel Food Colored Eggs Carefully
After dyeing your eggs, let them dry completely on a paper towel or drying rack to prevent smudging. Handle them gently, especially while they’re still fragile, to avoid cracks or breaks.
Using clean, dry hands or gloves will help keep your colors vibrant and intact.
Proper Drying Techniques
When you dye eggs with gel food coloring, letting them dry completely on a clean, paper towel-lined drying rack or egg carton is essential to prevent smudging. Make sure the eggs aren’t touching each other to avoid color transfer. To ensure even air circulation, carefully turn or reposition the eggs during drying.
This helps the color set uniformly and prevents any sticky spots where smudging might occur. Avoid stacking or piling the eggs; doing so can cause cracks or dull the vibrant color. Patience is key—wait at least 30 minutes to an hour for the dye to fully set and the surface to firm up before handling or decorating.
Following these proper drying techniques guarantees your gel food colored eggs stay bright and flawless.
Gentle Egg Handling
Since gel food colored eggs are fragile, you need to handle them gently to keep the shells intact and the colors vibrant. Always dry eggs thoroughly before touching them to prevent smudging or transferring dye. Use a soft, clean towel or drying rack for this step.
When you handle eggs, avoid direct pressure by using a spoon or tongs, and make sure to support the egg with both hands when lifting it out of the dye. This careful support helps prevent cracking and breakage. Wearing disposable gloves or washing your hands thoroughly will protect your skin from stains.
Enhance Eggs With Edible Shimmer or Paint for a Festive Look
Although your eggs already look vibrant from the gel food coloring, adding edible shimmer or paint can give them a festive, metallic glow that really makes them stand out. To create shimmer paint, mix edible shimmer powders with a bit of vanilla extract, vinegar, or clear alcohol until you get a smooth, paint-like consistency.
Use a fine brush or cotton swab to gently apply the shimmer paint to your dyed eggs, focusing on spots where you want extra sparkle. Let the eggs dry completely to avoid smudging.
If you prefer a subtler effect, lightly dust the eggs with edible shimmer powders using a dry brush or soft cloth. This simple step enhances your dyed eggs, giving them a polished, festive finish that’s perfect for any celebration.
Store and Display Gel Food Colored Eggs Safely
To keep your gel food colored eggs fresh and vibrant, store them in a cool, dry place or refrigerate them promptly. When you store your colored eggs, use egg cartons or airtight containers to protect their bright hues and prevent cracking.
Avoid leaving eggs outside the refrigerator for more than two hours, as this increases the risk of bacterial growth. Handle the eggs gently during storage and display to maintain their colorful finish and avoid damage.
If you don’t plan to eat your decorated eggs within a week, it’s safest to discard them to prevent spoilage. By following these steps, you’ll keep your gel food colored eggs looking beautiful and safe to enjoy for as long as possible.
Frequently Asked Questions
How to Dye Eggs With Gel Food Color?
You mix hot water and vinegar, then add gel food coloring drops. Stir well, dip your hard-boiled eggs for about five minutes, and let them dry.
Adjust coloring drops for lighter or darker shades as you like.
How to Use Gel Food Coloring?
You mix a few drops of gel food coloring with warm water and vinegar, stir well, then soak your eggs in the vibrant solution.
Adjust the amount of gel to control color intensity for perfect results every time.
What to Add to Food Coloring to Dye Eggs?
You add vinegar to brighten, you add water to dilute, and you add gel food coloring to tint.
These together create vibrant, lasting hues that cling to eggshells, making your dyed eggs colorful and beautiful.
Is There a Difference Between Food Coloring and Gel Food Coloring?
Yes, gel food coloring is thicker and more concentrated than regular food coloring. You’ll get more vibrant, intense colors with less product, but it needs stirring to mix well, unlike liquid food coloring that disperses quickly.
Conclusion
Now that you’ve danced through these colorful steps, your eggs are ready to shine like little jewels in spring’s treasure chest. With each vibrant hue and shimmering touch, you’ve turned simple shells into edible art that sings of celebration.
So, handle them gently, store them safely, and let your creativity bloom—because these gel food colored eggs aren’t just dyed; they’re bursting with joy. Ready to brighten your table and your day, these beautifully dyed eggs showcase the magic of using gel food coloring for egg dyeing.