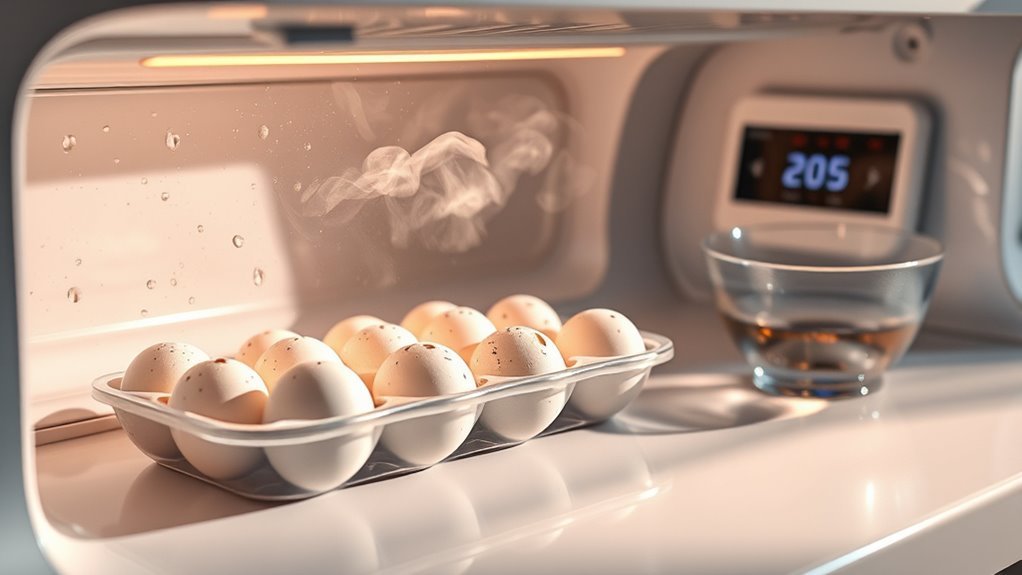
How to Increase Humidity in Egg Incubator Step by Step
To increase humidity in your egg incubator, start by filling all water trays and channels at least halfway and refill daily. This simple step helps maintain the right moisture level essential for successful hatching. Proper humidity is crucial to prevent eggs from drying out or becoming too wet.
Place damp sponges or cloths inside the incubator without letting them touch the eggs to boost moisture. Gently pour warm (not boiling) water into trays or create steam briefly for a quick rise in humidity.
Keep vents partially open for airflow but sealed enough to hold humidity inside. Monitor the humidity with a calibrated hygrometer and adjust settings gradually for stability. Maintaining consistent humidity throughout incubation promotes healthy embryo development.
Learn more tips to maintain perfect humidity and ensure your eggs hatch successfully.
Why Proper Humidity Is Essential During Incubation

While you might focus on temperature, maintaining proper humidity during incubation is just as essential to your eggs’ success. Humidity levels around 50-55% during early incubation keep the eggs from drying out or becoming too moist.
As the hatch approaches, raising humidity to 65-70% inside your incubator lubricates the chick’s hatch process, making it easier for them to pip and emerge without injury. Proper humidity also reduces the risk of chicks sticking to the shell, which can cause harm or prevent them from hatching fully.
Although slight fluctuations aren’t critical, consistent moisture ensures healthy embryo development. Using water in your incubator helps maintain these ideal humidity levels, which supports the eggs throughout incubation and especially during those crucial final days.
How to Use Water Channels and Trays to Boost Humidity

If you want to boost humidity inside your incubator, using water channels and trays effectively is key. Start by filling all water channels and trays to maximize the water surface area, which encourages evaporation and raises incubator humidity. Keep water channels at least half full, checking and refilling them daily to maintain consistent humidity levels.
Place shallow pans or cake trays filled with water near the heat source; the warmth speeds evaporation, increasing moisture in the air. To further enhance humidity, add wet sponges or cloths inside the trays—this expands the water surface and promotes more evaporation.
Adding Damp Cloths and Sponges to Increase Moisture

To increase humidity effectively, dampen a clean cloth or sponge with warm water so it’s moist but not dripping. Place the damp cloths or sponges on the bottom of the incubator or on top of the water trays to maximize evaporation and boost moisture levels. Make sure they don’t touch the eggs directly to prevent mold growth and uneven moisture absorption.
Positioning them near the heat source, like the incubator’s heater or fan, helps distribute humidity evenly throughout the space. Check the damp cloths regularly and re-wet them every 24 hours to maintain consistent moisture. Using damp cloths and sponges alongside water trays creates a steady evaporation process, which is key for keeping the incubator’s humidity at the right level for healthy egg development.
How to Quickly Raise Humidity With Warm Water and Steam
When you need to raise humidity quickly in your egg incubator, adding warm water directly to the water wells or trays works effectively. This method provides an immediate humidity boost, essential during hatching.
Here’s how to do it safely:
- Use a small pitcher or cup to gently pour warm water into the incubator’s water wells, avoiding sensors and electrical parts.
- Pour steaming water into the water trays to create instant moisture.
- Direct steam from a hot shower or boiling water near the incubator for a temporary humidity increase.
- Always monitor humidity levels with a hygrometer to prevent over-humidifying when using warm water or steam.
These steps ensure your incubator maintains ideal humidity for healthy egg development.
How to Keep Airflow Without Losing Humidity
You’ll need to balance ventilation and moisture by keeping about one-third of the vent area open for fresh air without letting humidity escape. Adjust the vent openings carefully and use damp sponges to encourage evaporation without causing drafts.
Position vents so airflow gently circulates around the eggs, helping maintain the right humidity levels throughout incubation.
Balancing Ventilation And Moisture
Although ventilation is essential for healthy embryo development, balancing airflow without losing humidity can be challenging. You need to carefully manage ventilation to keep humidity stable while ensuring fresh air circulates.
Here’s how you can balance ventilation and moisture effectively:
- Keep vents partially open (about one-third) to limit airflow and prevent humidity loss.
- Place water trays near vents to boost humidity without increasing airflow too much.
- Use a hygrometer to monitor humidity levels and adjust vents incrementally for balance.
- Avoid opening the incubator frequently; instead, tweak vent positions gradually to maintain steady moisture.
Optimal Vent Opening Size
Since maintaining proper airflow is essential for embryo development, adjusting the vent opening size helps you balance oxygen exchange without losing too much humidity. Aim to keep the vent opening at about one-third of the incubator’s surface area for ideal incubator ventilation. Partially closing vents reduces moisture loss while still allowing enough oxygen to reach the eggs.
You can use adjustable vents or cover them with damp cloths to fine-tune airflow precisely, enhancing your humidity control. During the critical hatch period, sealing vents tightly boosts humidity to support successful hatching. Remember to monitor humidity levels regularly and adjust vent openings accordingly to prevent harmful fluctuations.
Using Evaporation Without Drafts
When you want to maintain humidity in your incubator without creating drafts, placing shallow pans of water or damp sponges away from air vents works effectively. This method promotes evaporation while minimizing airflow disruption.
- Position water-filled shallow pans or damp sponges on the incubator floor, avoiding direct air vents to prevent drafts.
- Cover or partially close vents during hatching to reduce airflow but keep enough moisture for proper humidity.
- Use a damp cloth on the floor as an additional evaporation surface without blocking necessary air circulation.
- Keep the incubator in a draft-free area, and avoid frequent vent or lid openings to maintain steady humidity.
Regularly monitor humidity with a hygrometer and adjust water sources or vent covers to balance evaporation and airflow effectively.
How to Make Sure Your Humidity Gauge Is Accurate
To get accurate humidity readings, you’ll want to calibrate your hygrometer properly and place it inside the incubator where the eggs are. Make sure it’s not near vents or heating elements and let it settle for at least 30 minutes before checking the levels.
Regularly monitor and recalibrate your device to keep your readings consistent and reliable.
Calibration Methods Explained
Although humidity gauges can drift over time, you can guarantee your readings stay accurate by calibrating your hygrometer regularly. To ensure accurate readings and reliable humidity levels in your incubator, follow these calibration methods:
- Place the hygrometer in a sealed bag with a damp cloth to create near 95% humidity, then compare its reading to this known level.
- Perform the salt test by sealing the hygrometer with a saturated salt solution; after 8-12 hours, it should read about 75% humidity.
- Always start calibration at room temperature since temperature changes affect accuracy.
- Adjust the calibration screw if available, or note any discrepancies for future reference.
Regular calibration keeps your humidity levels precise, helping your incubator perform at its best.
Placement Inside Incubator
Calibrating your hygrometer is only part of maintaining accurate humidity levels in your incubator. Proper placement inside the incubator is essential for reliable readings. Position the hygrometer at egg level, away from direct water contact, to avoid skewed humidity measurements.
Keep it clear of the heating element and vents since they can cause false spikes or drops in humidity. Make sure the sensor isn’t in an area with drafts or temperature fluctuations, as steady airflow ensures consistent readings. After placing the hygrometer, give it at least 30 minutes to acclimate before checking the humidity.
Regularly verify accuracy through calibration tests, but remember, where you put your humidity gauge inside the incubator can make or break your ability to maintain the right environment for your eggs.
Monitoring For Consistency
When you want reliable humidity readings, you need to monitor your hygrometer’s accuracy regularly. This ensures your incubator maintains the perfect environment for your eggs. Here’s how to do it effectively:
- Calibrate your hygrometer by placing it in a sealed bag with a damp cloth; it should read around 95% RH.
- Let the hygrometer sit inside the incubator for at least 24 hours to stabilize before trusting its readings.
- Cross-check the humidity readings with a second hygrometer or a known accurate device to confirm consistency.
- Regularly inspect your hygrometer for dust, moisture buildup, or damage, and keep it away from heat sources or drafts to avoid false readings.
Using Egg Weight Loss to Track Incubator Humidity Effectiveness
To guarantee your incubator maintains the right humidity, you can track egg weight loss throughout incubation. Egg weight loss of about 12-14% signals proper humidity control and healthy embryo development. Weigh your eggs every two days using a precise scale to monitor changes.
If weight loss is below this range, your incubator’s humidity is likely too high, restricting moisture loss. Conversely, excessive weight loss means humidity is too low, risking dehydration. Regular incubator monitoring through egg weight loss helps you fine-tune humidity levels for ideal moisture balance.
Troubleshooting Common Incubator Humidity Problems
Although maintaining proper humidity can be challenging, you can resolve most common problems by carefully measuring levels and adjusting water sources inside your incubator. Start by using a calibrated hygrometer to check if incubator’s humidity falls below the desired 65%.
Then:
- Add more water to trays and ensure they’re fully filled with maximum surface exposure.
- Increase water surface area by placing damp sponges or wet towels inside to boost evaporation.
- Minimize opening the incubator during critical hatch days to prevent humidity loss.
- If humidity stays low despite adding water, consider using an external humidifier or steam source temporarily.
Tips to Maintain Stable Humidity During Critical Hatch Days
During the critical hatch days, you’ll want to minimize opening the incubator to keep humidity steady and prevent moisture loss.
If humidity drops, adding warm water to your water trays can quickly boost levels without causing a temperature shock.
These simple steps help create the stable environment your chicks need to hatch successfully.
Minimize Incubator Openings
When you limit how often you open the incubator in the final days, you help maintain stable humidity levels crucial for successful hatching.
To minimize incubator openings and protect humidity levels, follow these steps:
- Pre-fill water trays before the last 3-5 days to reduce the need for adding water later.
- Open the incubator only when necessary for candling or checking eggs.
- When you must open it, do so quickly and close the lid immediately to retain moisture.
- If humidity drops, add warm, damp water swiftly to the water trays, then close the incubator.
Use Warm Water Boost
If you want to maintain stable humidity levels during critical hatch days, adding warm water inside the incubator provides a quick and effective boost. To raise humidity quickly, pour warm water directly onto the heating element, being careful to avoid sensors and wires.
You can also use a clean, damp sponge soaked with warm water inside the incubator for a gradual humidity boost. Before opening, prepare warm water in a cup to add swiftly, minimizing humidity drops.
During hatching eggs, top off water channels with warm water to keep humidity steady. Always monitor your incubator’s humidity with a calibrated hygrometer while adding warm water to avoid overshooting. This method guarantees consistent humidity and improves your chances of a successful hatch.
Preventing Humidity Fluctuations for a Successful Hatch
Although maintaining proper humidity is essential throughout incubation, you need to pay special attention during the hatch phase to prevent fluctuations that can stress the chicks or cause them to stick to their shells. For a successful hatch, keep humidity inside the incubator steady between 65-75% when hatching chicken eggs.
Maintaining 65-75% humidity during hatching prevents chick stress and sticking to shells.
Here’s how you can prevent fluctuations:
- Keep water sources and moist materials topped up and well-placed to ensure consistent evaporation.
- Minimize opening the incubator lid or vents to avoid sudden humidity drops.
- Use a hygrometer to monitor humidity inside and make gradual adjustments with warm water or damp cloths.
- Seal any air leaks or cracks to maintain stable conditions while incubating chicken eggs and keep eggs safe during this critical phase.
Frequently Asked Questions
How Do I Raise the Humidity in My Incubator?
You can raise humidity by filling water trays fully, adding damp cloths or sponges inside, and placing shallow pans of warm water nearby.
Keep your hygrometer handy to monitor and adjust water levels as needed regularly.
What Happens if the Humidity Is Too Low in an Incubator?
You might think low humidity won’t matter much, but it causes eggs to lose moisture, making chicks shrink-wrapped and weak.
They struggle hatching, can get stuck, and hatch rates drop, risking your entire batch’s success.
Can I Use a Sponge to Increase Incubator Humidity?
Yes, you can use a damp sponge to increase incubator humidity. Just make sure it’s not dripping, place it away from heating elements, and re-wet it regularly to keep moisture consistent without causing damage.
How to Increase Humidity in Incubator During Lockdown?
You should fill water channels fully, add warm water to wells, place damp towels or sponges near eggs, use soaked evaporating cloths, and keep vents closed partially to trap humidity during lockdown while monitoring with a hygrometer.
Conclusion
Think of your incubator like a tiny greenhouse nurturing delicate seeds—without the right moisture, growth stalls. By carefully managing humidity, you create a gentle mist that wraps each egg in a protective embrace, just as morning dew sustains fragile blooms.
Keep this balance steady, and you’ll watch life unfold beautifully. Remember, just like a gardener tending to their plants, your attentive care guarantees every egg hatches strong and healthy.
Increasing humidity in an egg incubator is essential for successful hatching. By following these steps to increase humidity in your egg incubator, you ensure optimal conditions for the eggs to develop and hatch successfully.